Have you ever dreamed of growing a unique, low-maintenance plant that not only adds beauty to your garden but also provides edible fruit? If you’re nodding along, then the spineless prickly pear cactus (Opuntia ficus-indica) might be your new best friend. This versatile plant is perfect for gardeners who want to add a touch of the desert to their landscape without the hassle of dealing with sharp spines.
In this guide, I’ll walk you through everything you need to know about growing spineless prickly pear cactus, from planting to harvesting. Whether you’re a seasoned gardener or a complete newbie, you’ll find this guide packed with practical tips, fun facts, and step-by-step instructions to help you succeed.
What are Spineless Prickly Pear Cacti?
The Spineless Prickly Pear Cactus (Opuntia ellisiana and other spineless varieties) is a unique type of prickly pear known for its smooth, flat, club-shaped pads that lack the large spines found on most other species. However, some varieties may still have small, hair-like glochids that can detach upon contact.
While many cacti thrive in hot, arid regions, the Spineless Prickly Pear is more cold-tolerant than some of its relatives, though its hardiness depends on the specific variety. Most spineless types grow best in USDA zones 7–11, though some may survive in slightly colder climates with protection. For optimal growth, it should be planted outdoors in the spring after the risk of frost has passed.
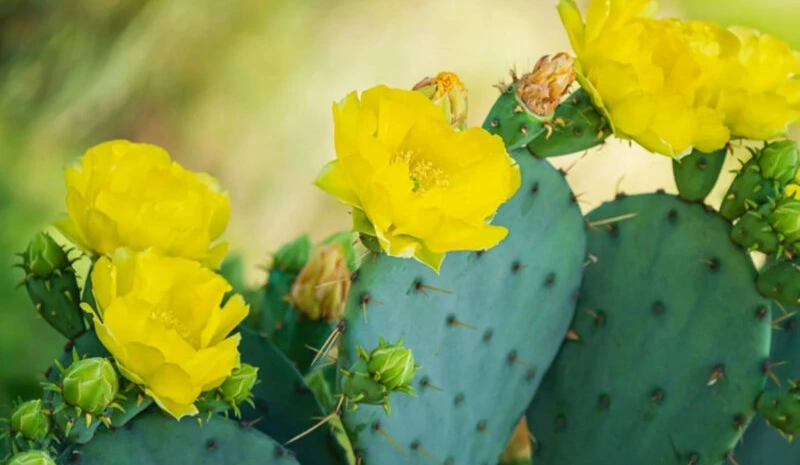
This cactus is valued for its edible fruit, which develops once the plant matures. However, like other prickly pears, it has a slow growth rate, often taking three to four years before it begins producing fruit.
Key Features
Scientific Name: Opuntia ellisiana (common spineless variety)
Mature Size: 3–5 feet tall, 4–6 feet wide
Cold Tolerance: Hardy in USDA Zones 7–11. Can tolerate occasional light frost but may need protection in colder climates.
Expected Planting Period: Spring, after the last frost date
Growth Rate: Slow to moderate; takes 3–4 years to begin fruiting
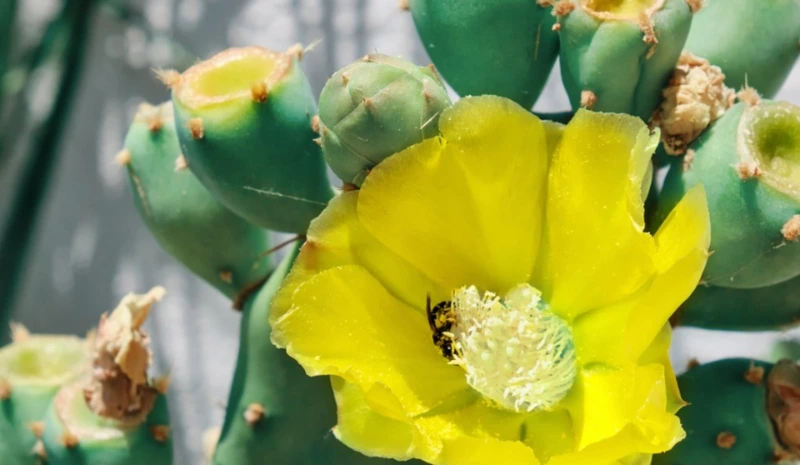
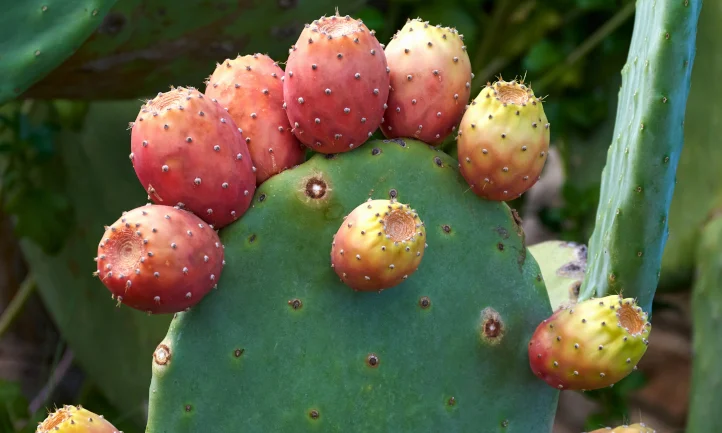
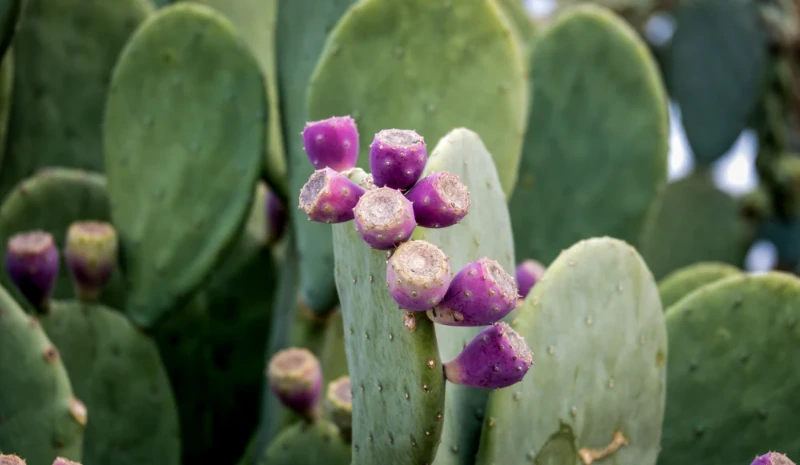
Flower Characteristics: Produces large, bright yellow flowers in late spring to early summer, which develop into edible, reddish-purple fruit when mature
Invasiveness: Non-invasive, but spreads through fallen pads that easily root in the soil
Growth Habit: A low-maintenance, drought-tolerant succulent with a spreading, shrubby form. Ideal for xeriscaping, wildlife gardens, and edible landscaping.
Fact: Beyond its fruit, the pads (nopales) are edible and commonly used in Mexican cuisine.
Planting Spineless Prickly Pear Cactus
The Spineless Prickly Pear is a resilient and low-maintenance cactus that brings a striking, sculptural look to any landscape. If you’re ready to introduce this unique beauty to your garden, let’s go over the essential steps for successful planting and care.
1. Choosing the Right Location
Spineless Prickly Pear thrives in full sun, requiring at least 6–8 hours of direct sunlight daily to ensure healthy growth and vibrant flowering. Plenty of sunlight also encourages the production of its edible fruit.
While it can tolerate partial shade, reduced sunlight may slow growth and limit flowering. For the best results, select a sunny, open space where the cactus can receive ample light and warmth.
2. Soil Preparation
Well-draining soil is essential for the Spineless Prickly Pear, as excess moisture can lead to root rot. Sandy or gravelly soil with good aeration works best, allowing water to drain quickly while still providing necessary nutrients.
For ideal growth, aim for a slightly acidic to neutral soil pH (6.0 to 7.5). Amending heavy clay soils with sand or perlite can improve drainage and prevent water retention. By ensuring the right soil conditions, you’ll help your cactus establish strong roots and thrive for years to come.
3. Planting
To plant your Spineless Prickly Pear Cactus, start by digging a hole slightly wider than the base of the pad or root ball but no deeper than necessary. This ensures the cactus remains stable while preventing excess moisture buildup around the roots.
If planting multiple cacti, space them at least 3–4 feet apart, as they will spread over time.
For pad propagation, allow freshly cut pads to dry in a shaded area for a few days to a week before planting. This helps the cut end form a callus, reducing the risk of rot. Once dried, plant the pad upright, burying the lower third in well-draining soil.
If transplanting a nursery-grown cactus, gently remove it from its pot and place it in the hole so that the base is level with the surrounding soil. Avoid burying the pad too deeply, as this can cause rot.
Fill the hole with soil, gently firming it around the base while ensuring good drainage. Water lightly after planting to help the soil settle, but avoid overwatering—Spineless Prickly Pear prefers dry conditions.
4. Container Planting Tips
-
Use a pot with drainage holes to prevent water accumulation.
-
Choose a well-draining cactus mix, or amend regular potting soil with sand or perlite.
-
Select a container at least 12–16 inches wide, allowing room for growth.
Growing Spineless Prickly Pear Cactus
1. Watering
Spineless Prickly Pear is highly drought-tolerant and thrives in dry conditions. Water sparingly, allowing the soil to fully dry out between waterings. Overwatering is the most common cause of issues, as excess moisture can lead to root rot.
During the growing season (spring and summer), water every 2–3 weeks, depending on your climate. In extremely hot conditions, you may need to water slightly more often. In fall and winter, reduce watering to once a month or stop altogether if the plant is outdoors and dormant.
If growing in a container, check that the pot has drainage holes, as potted cacti dry out faster than those planted in the ground.
2. Fertilizing
Feed the cactus with a low-nitrogen, slow-release fertilizer or a cactus-specific fertilizer in early spring to support healthy growth and flowering. A balanced 10-10-10 or 5-10-10 fertilizer works well.
Too much fertilizer can lead to excessive, weak growth, so limit feeding to once or twice per year—once in early spring and optionally again in midsummer.
3. Potting and Repotting
When growing Spineless Prickly Pear in a container, choose a pot at least 12–16 inches wide with excellent drainage. A terra cotta or unglazed ceramic pot is ideal, as it allows moisture to evaporate more efficiently.
Repot every 3–4 years or when the plant outgrows its container. Use a well-draining cactus mix, or amend regular potting soil with sand, perlite, or pumice for improved drainage. When repotting, handle pads carefully to avoid breaking them off, and allow any damaged areas to callus before replanting.
4. Seasonal Care
Spring: Resume watering and apply a light dose of fertilizer to encourage new growth.
Summer: Water deeply but infrequently, especially during extreme heat. If in a pot, ensure it’s not sitting in standing water.
Fall: Reduce watering and stop fertilizing to prepare for dormancy. Trim off any dead or damaged pads.
Winter: Most Spineless Prickly Pear varieties can handle mild frost, but if temperatures drop below 20°F (-6°C), protect outdoor plants with frost cloths or bring potted plants indoors. Avoid watering during dormancy to prevent root rot.
Pruning
Pruning isn’t necessary for the health of the Spineless Prickly Pear Cactus, but it can help control its size, especially in smaller gardens or containers. Since this cactus lacks large spines, it’s easier to handle, but some varieties may still have tiny glochids, so wearing gloves is a good idea.
To prune, hold individual pads gently and cut them away at the joint where they connect to the main plant. Avoid cutting through the middle of a pad, as this can cause unnecessary damage. The removed pads can be repurposed for propagation or composted.
Propagating Spineless Prickly Pear
Spineless Prickly Pear is easy to propagate and can be grown from cuttings (pads) or seeds. The most reliable method is pad propagation, which can be done at any time during the growing season.
How to Propagate by Cuttings
-
Select a healthy pad and gently twist or cut it off at the joint.
-
Allow the cut end to dry for several days to a week in a shaded area so it forms a callus. This prevents rot when planted.
-
Once calloused, place the base of the pad upright in a pot filled with dry, well-draining cactus mix. Avoid deep planting—bury only the lower third.
-
Water lightly once, then wait until new growth appears before watering again to prevent rot.
-
The pad will root in a few weeks, indicated by resistance when given a gentle tug.
Once established, the new cactus can be transplanted outdoors or repotted as it grows.
How to Get Spineless Prickly Pear to Bloom
Spineless Prickly Pear may take several years to mature before it starts flowering and producing fruit. If your plant isn’t blooming, consider these factors:
-
Sunlight: It needs at least 6–8 hours of full sun daily to encourage blooming.
-
Soil Conditions: Very porous, well-draining soil with minimal organic material is best.
-
Minimal Fertilization: Too much nitrogen can promote excessive pad growth at the expense of flowers. If needed, apply a low-nitrogen fertilizer (like 5-10-10) once in spring.
-
Less Attention is Better: Overwatering, over-fertilizing, or excessive pampering can delay blooms.
Common Problems and How to Solve Them at Home
Spineless Prickly Pear Cactus is generally low-maintenance but can be affected by pests and diseases.
Pests: Scale insects and mealybugs are the most common culprits, particularly on indoor or potted plants. These pests can be treated by dabbing them with rubbing alcohol, spraying neem oil, or using an appropriate insecticidal soap. Regularly inspecting your cactus can help catch infestations early.
Diseases: Like other Opuntia species, Spineless Prickly Pear is susceptible to Phyllosticta fungus, which causes black lesions and scabbing on the pads. This fungal infection thrives in humid, wet conditions and spreads easily between plants. There is no effective treatment—infected pads should be removed and discarded to prevent further spread. Ensuring proper air circulation and keeping the cactus dry can help minimize risk.
Frequently Asked Questions (FAQs)
1. How fast does the Spineless Prickly Pear grow? The Spineless Prickly Pear grows slowly to moderately, typically adding a few new pads per year. It can take 3–4 years to reach maturity and start producing fruit. Growth is fastest in warm, sunny conditions with well-draining soil.
2. Does the Spineless Prickly Pear really have no spines? Yes, the Spineless Prickly Pear lacks the large, sharp spines found on other Opuntia species. However, many varieties still have tiny, hair-like glochids, which can detach and irritate the skin. Handling with gloves is still recommended.
3. Can Spineless Prickly Pear survive cold weather? Most Spineless Prickly Pear varieties thrive in USDA Zones 7–11 and can tolerate light frost. However, prolonged freezing temperatures (below 20°F / -6°C) can damage or kill the plant. In colder climates, it’s best to grow it in a container and bring it indoors for winter.
4. How do I get my Spineless Prickly Pear to bloom and fruit?
To encourage flowering and fruiting:
-
Provide at least 6–8 hours of full sun daily
-
Use well-draining soil with minimal organic material
-
Avoid excessive watering and fertilization, as too much nitrogen encourages pad growth over blooms
-
Be patient—it can take a few years before the plant is mature enough to bloom
5. Is Spineless Prickly Pear safe to eat? Yes! The pads (nopales) and fruit (tunas) are both edible. The pads are often used in Mexican cuisine, while the fruit is sweet and can be eaten fresh or used in drinks, jams, and desserts. Just be sure to remove any glochids before consuming.
Conclusion
The Spineless Prickly Pear Cactus is a stunning and low-maintenance addition to any garden or home. With minimal care, it rewards you with its unique, sculptural pads, vibrant yellow blooms, and delicious, edible fruit.
So, why wait? Bring this hardy, drought-tolerant beauty into your collection today! If you’re already growing one or planning to, let me know—I’d love to hear about your experience!